

How to Set Up ClawdBot: A Complete Installation Guide for Performance Marketers
How to Set Up ClawdBot: A Complete Installation Guide for Performance Marketers

AI agents are quickly moving from experiments to daily operators. For performance marketers, that shift is especially important: less time configuring tools, more time interpreting outcomes and acting on them.
This guide walks through how to install and set up ClawdBot step by step, using the official one-liner installation. It’s written for operators who want ClawdBot running locally, connected to an AI model, and ready to send reports through a chosen channel—without guesswork.
What Is ClawdBot?
ClawdBot is a locally installed AI agent framework designed to run autonomous or semi-autonomous tasks directly from your machine.
Instead of working as a browser-only chatbot, ClawdBot operates as:
A terminal-based AI agent
With optional web UI
Capable of executing commands, installing skills, running workflows, and sending outputs to external channels
Because it runs locally, ClawdBot gives operators more control over:
Model selection (OpenAI, Google, Anthropic, OpenRouter, etc.)
Skills and hooks
Data flow and automation logic
This makes it particularly useful for performance marketers who want AI agents that can assist with research, reporting, automation, and repeatable operational tasks—without being locked into a single SaaS interface.
How Performance Marketers Can Use ClawdBot
For performance and growth teams, ClawdBot fits into workflows where repeatability and automation matter more than UI polish.
Common use cases include:
Generating and summarizing campaign performance reports
Automating research tasks across platforms
Running structured prompts repeatedly with different inputs
Sending insights or alerts to Slack, Discord, or other channels
Acting as a lightweight “AI operator” alongside Ads Manager, analytics tools, or internal scripts
The key advantage is flexibility: ClawdBot adapts to how you already work, instead of forcing a new dashboard-first workflow.
How to Install ClawdBot
Below is the official quick-start installation flow, broken down clearly so you can follow it without friction.
Pre-requisites
Before installing ClawdBot, make sure you have:
A Mac or Windows machine
Access to your system terminal / command prompt
Admin privileges (you’ll need your device password)
An API key for at least one AI provider (e.g. OpenAI, Google, Anthropic)
A basic familiarity with command-line prompts (no advanced knowledge required)
Step-by-Step ClawdBot Installation Guide
Step 1: Visit the Official ClawdBot Website
Go to: https://clawd.bot/
This is the official source for installation instructions and updates.
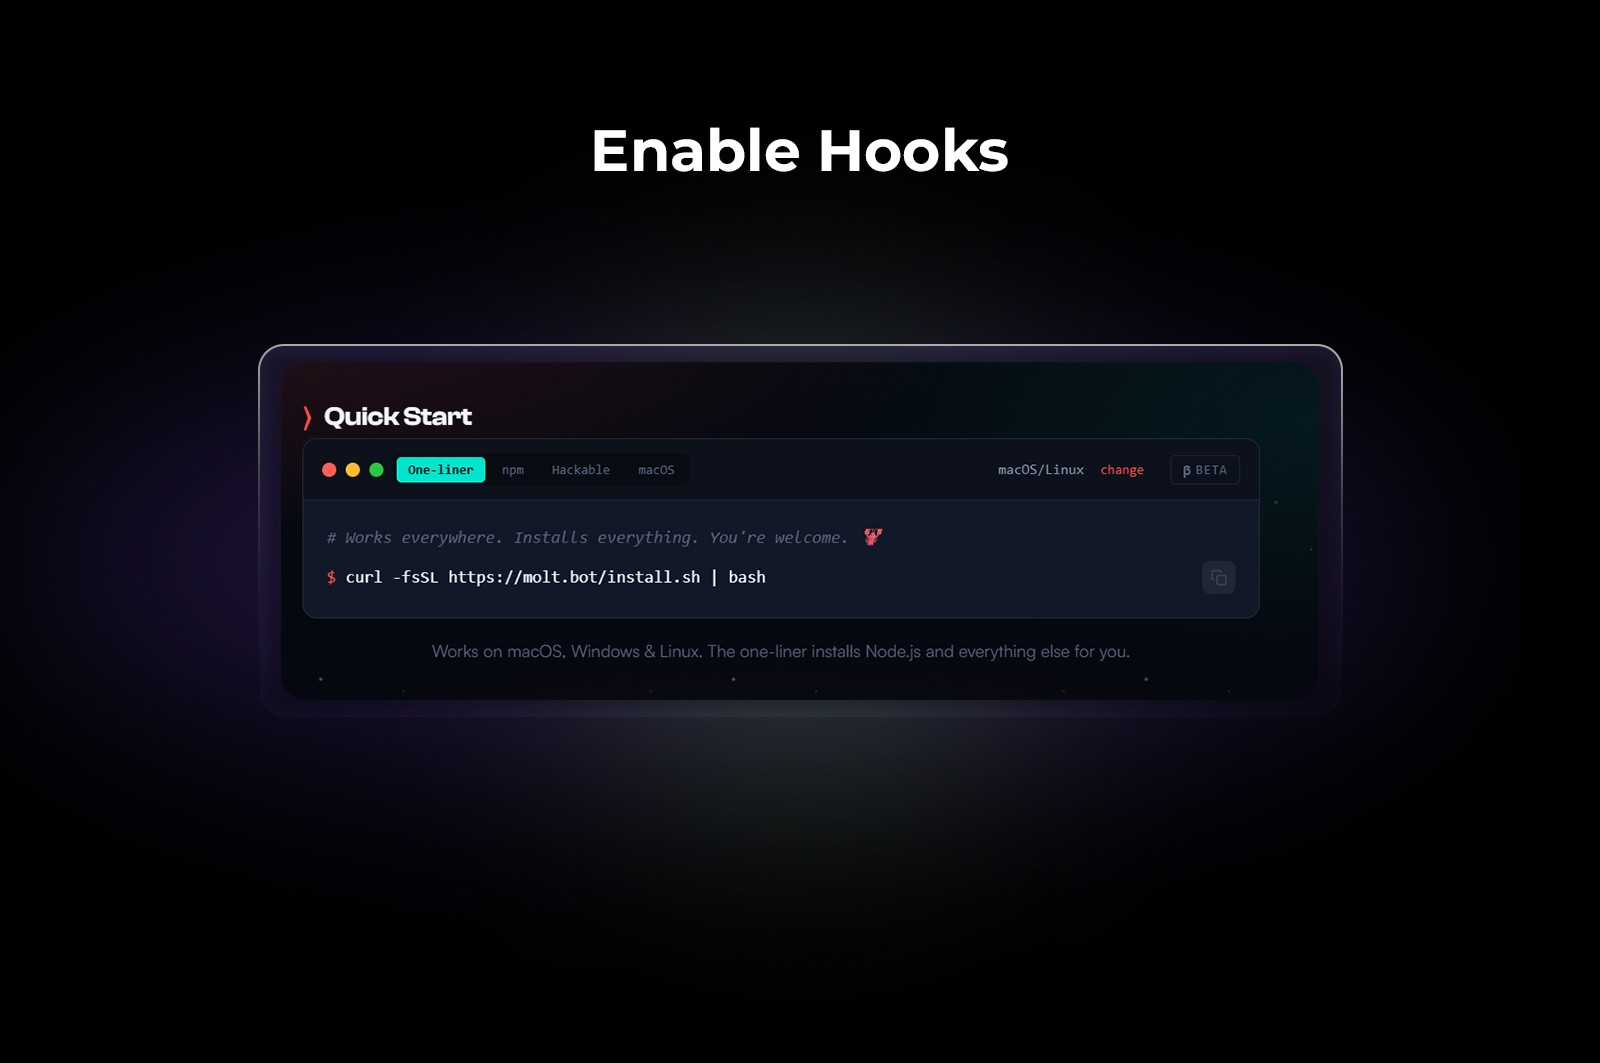
Step 2: Open the Quick Start Section
On the homepage, navigate to the Quick Start section.

Here, you’ll find multiple installation options.
Select the one-liner installation method.
This is the fastest and most reliable way to get started.
Step 3: Select Your Operating System
Choose your operating system:
macOS
Windows
Linux (if applicable)
ClawdBot will automatically display the correct one-liner command for your system.
Step 4: Copy the One-Liner Installation Command
Copy the generated command exactly as shown.
Open your terminal (Mac/Linux) or Command Prompt / PowerShell (Windows) and paste the above command.
Press Enter to begin installation.
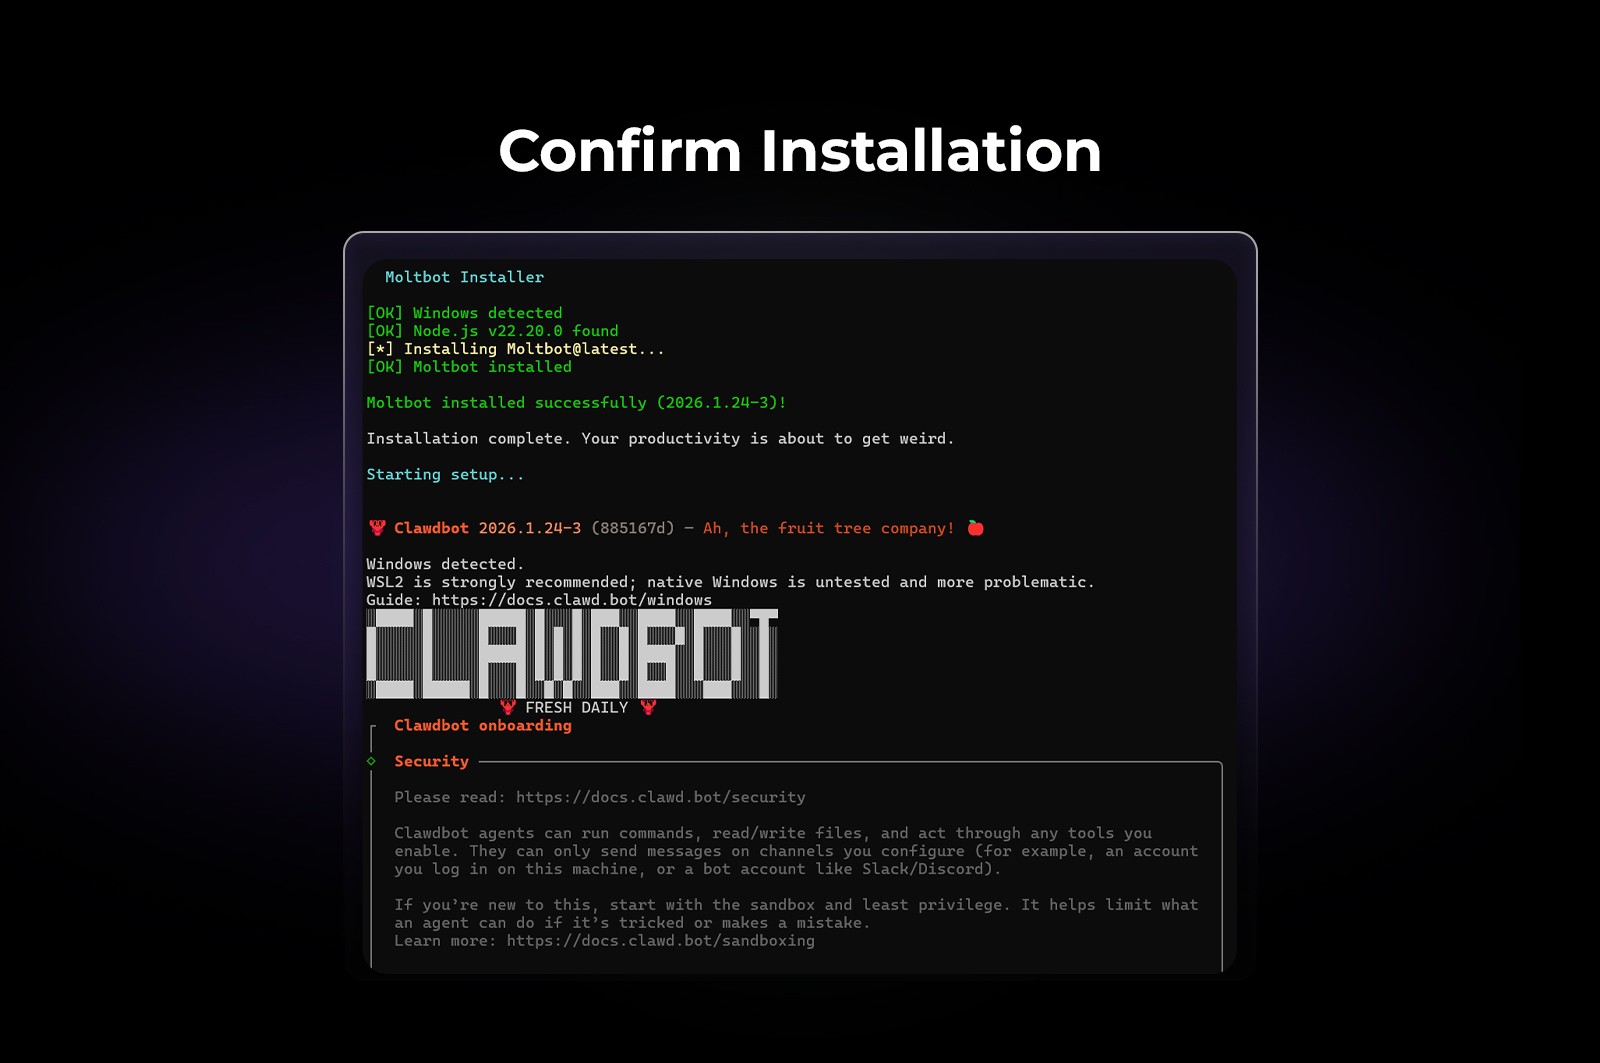
Step 5: Confirm Installation
When prompted, confirm that you want to continue with the installation.
ClawdBot will now:
Download required files
Set up the local environment
Prepare onboarding steps
Step 6: Choose the Onboarding Method
You’ll be asked to select an onboarding method.
Choose: Quickstart
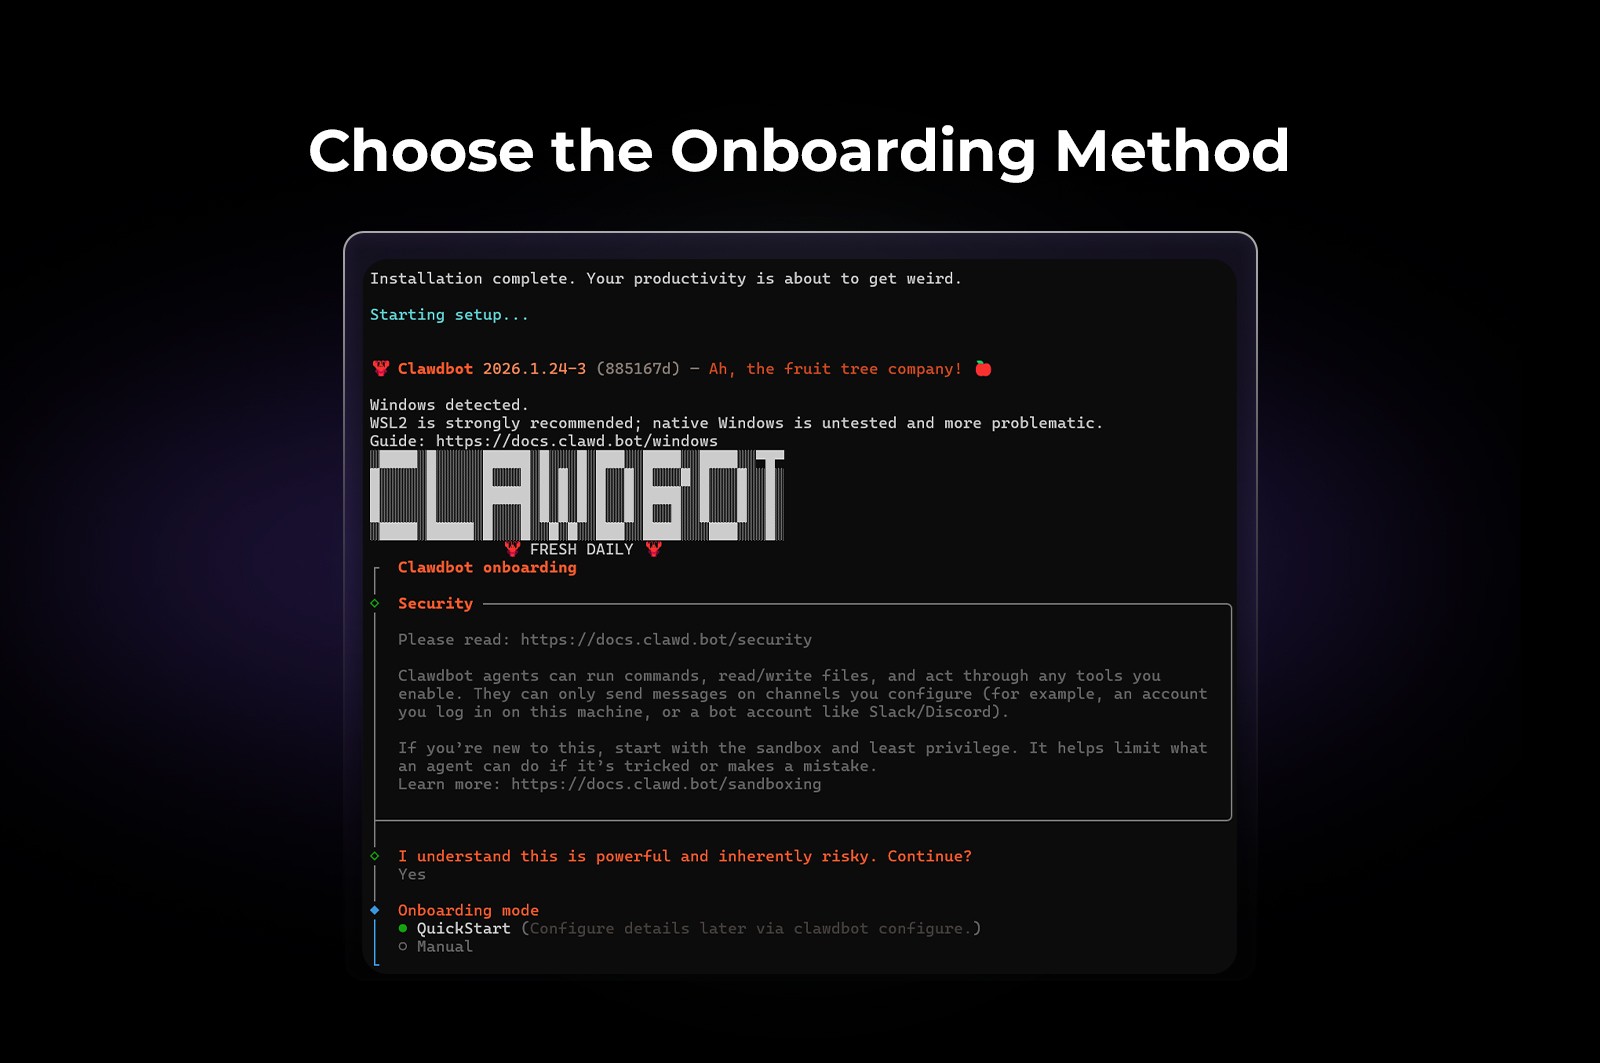
This option skips advanced customization and gets ClawdBot operational as quickly as possible.
Step 7: Select an AI Model Provider
ClawdBot will prompt you to choose an AI provider. Available options typically include:
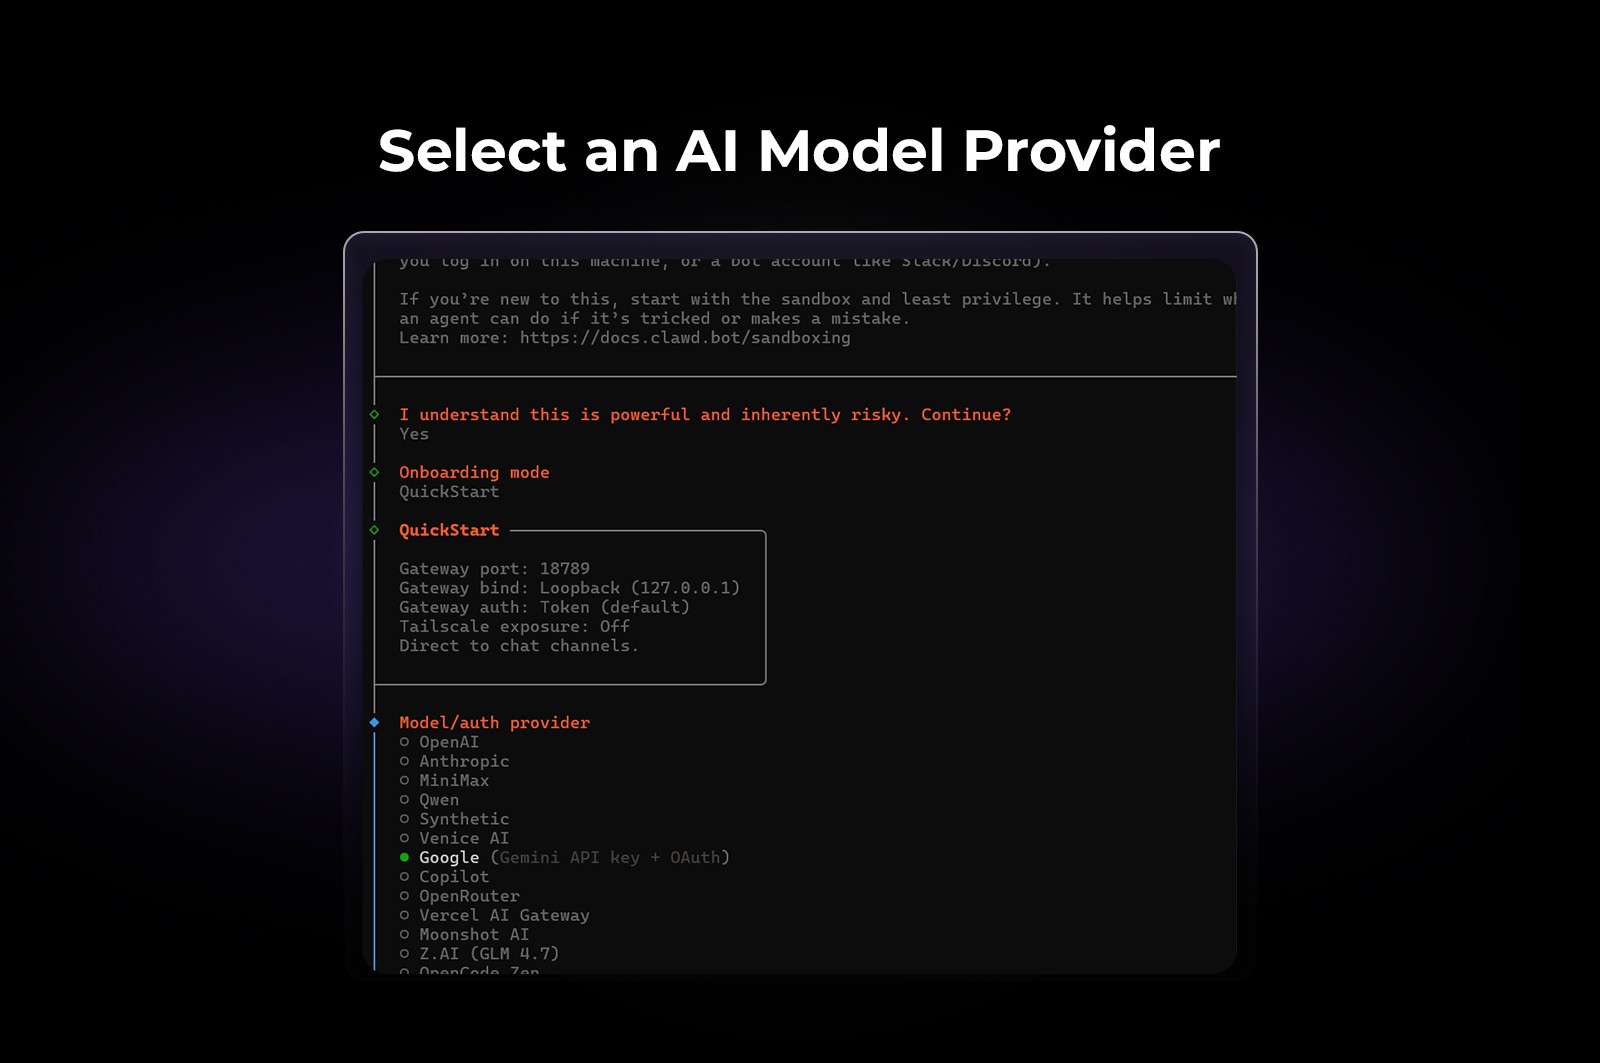
At this stage, you’re only selecting the provider—not the specific model yet.
Step 8: Filter Models by Provider
When prompted to filter models by provider, select:
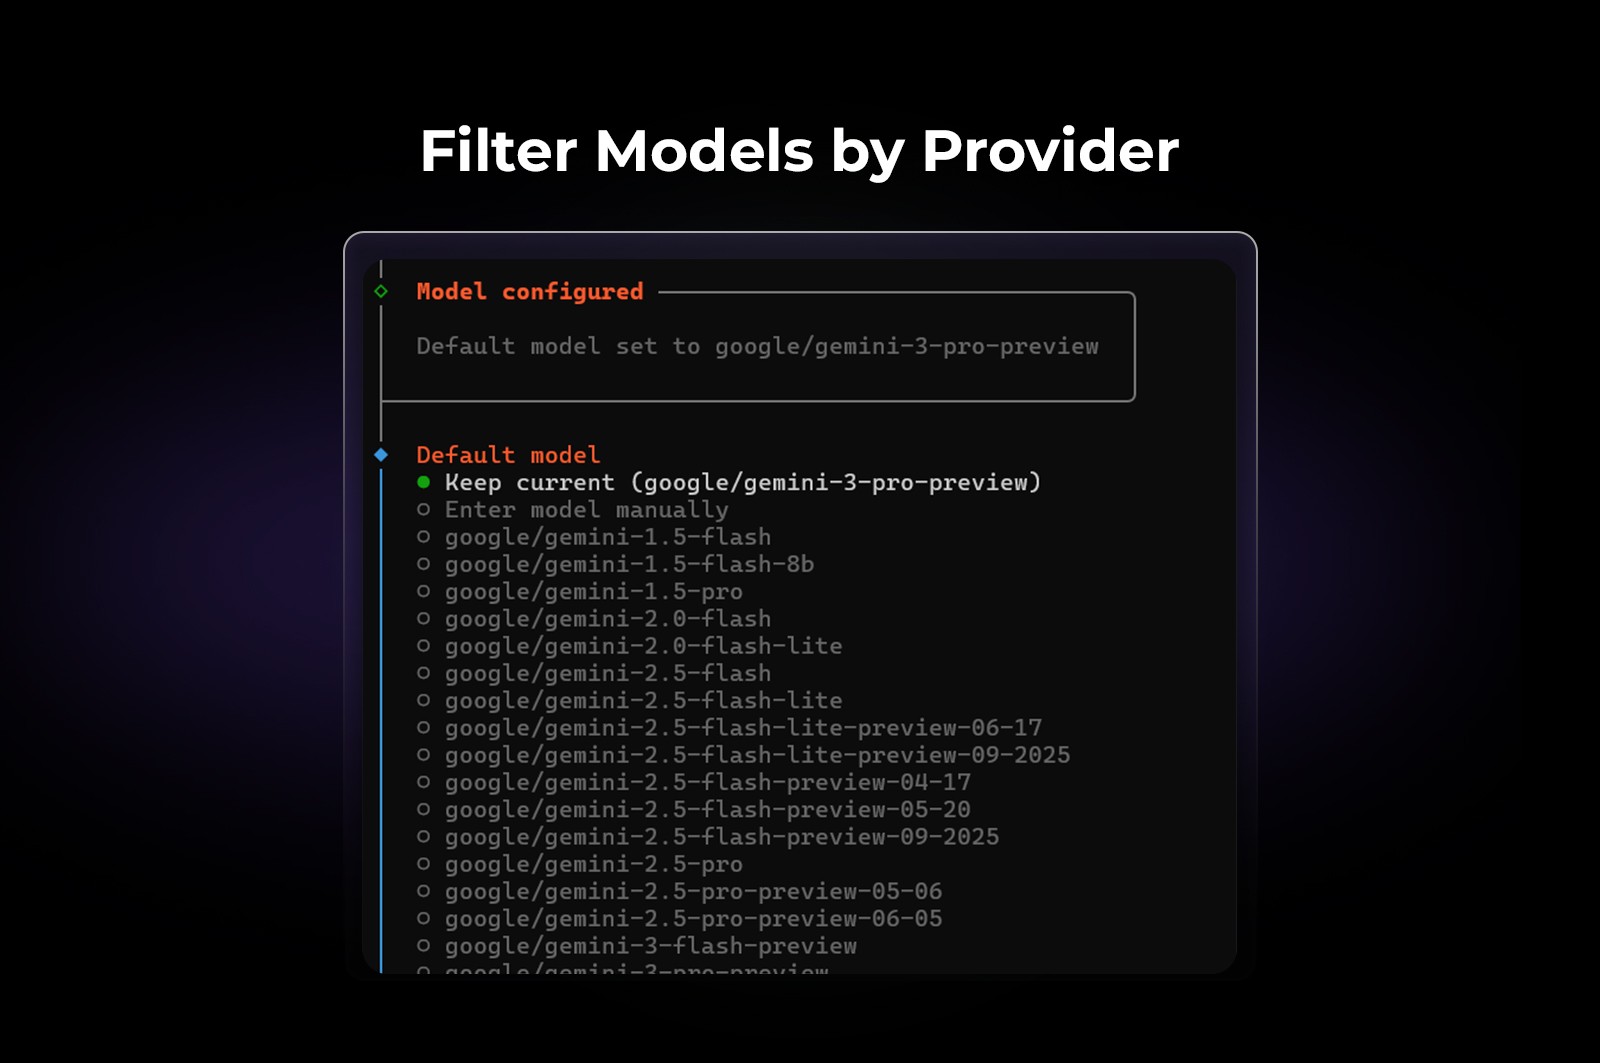
This ensures you can view the full list of available models before choosing a default.
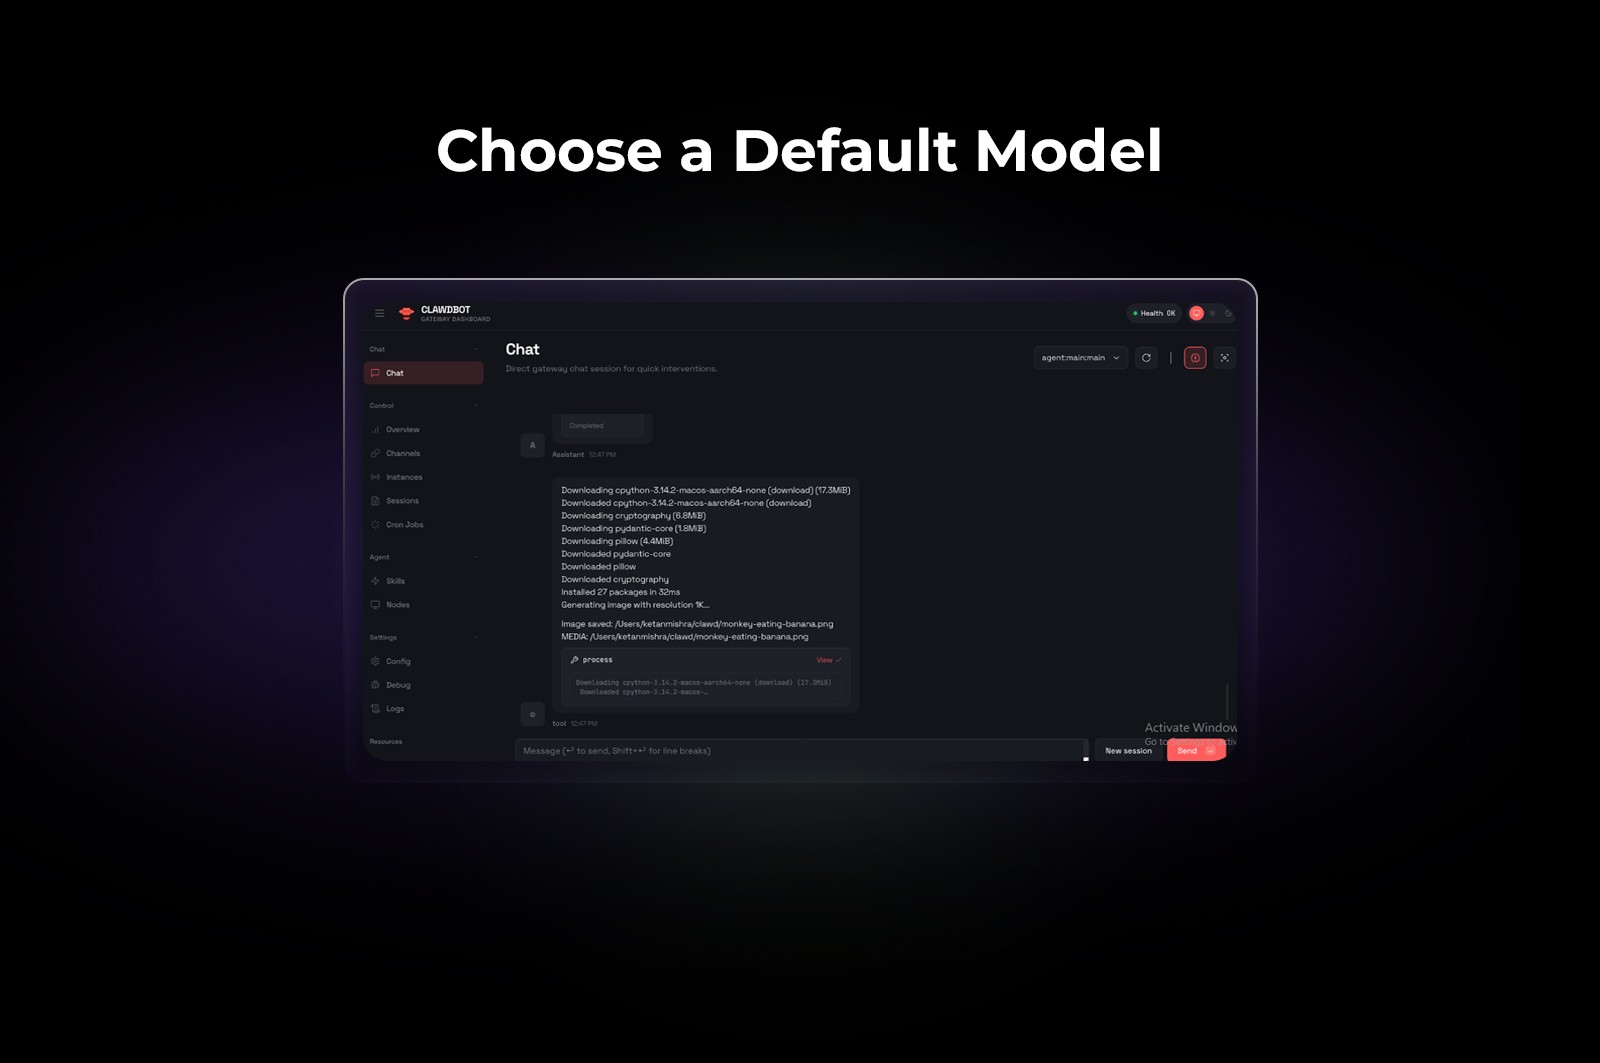
Step 9: Choose a Default Model
Next, ClawdBot will ask you to select a default model.
For this setup, we’ve proceeded with:
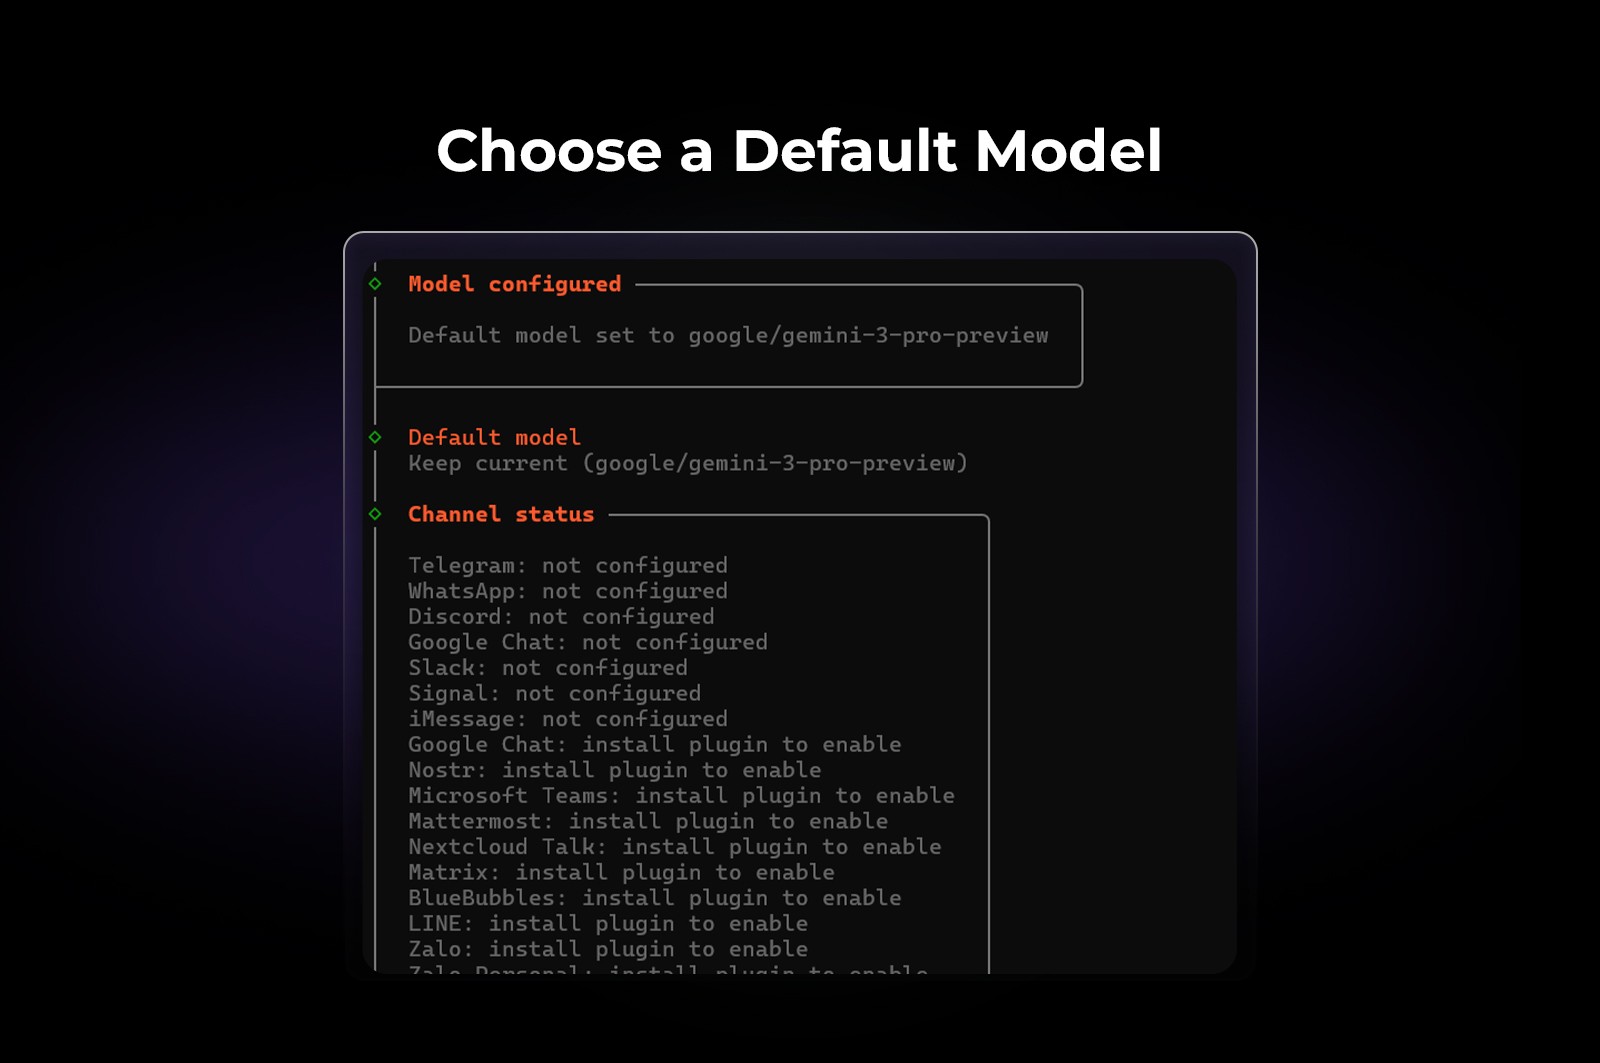
You can always change the default model later as your workflows evolve.
Step 10: Select a Communication Channel
ClawdBot can send outputs—such as reports, logs, or updates—to a connected channel.
Choose the channel where you want ClawdBot to:
Send reports
Share updates
Surface automated outputs
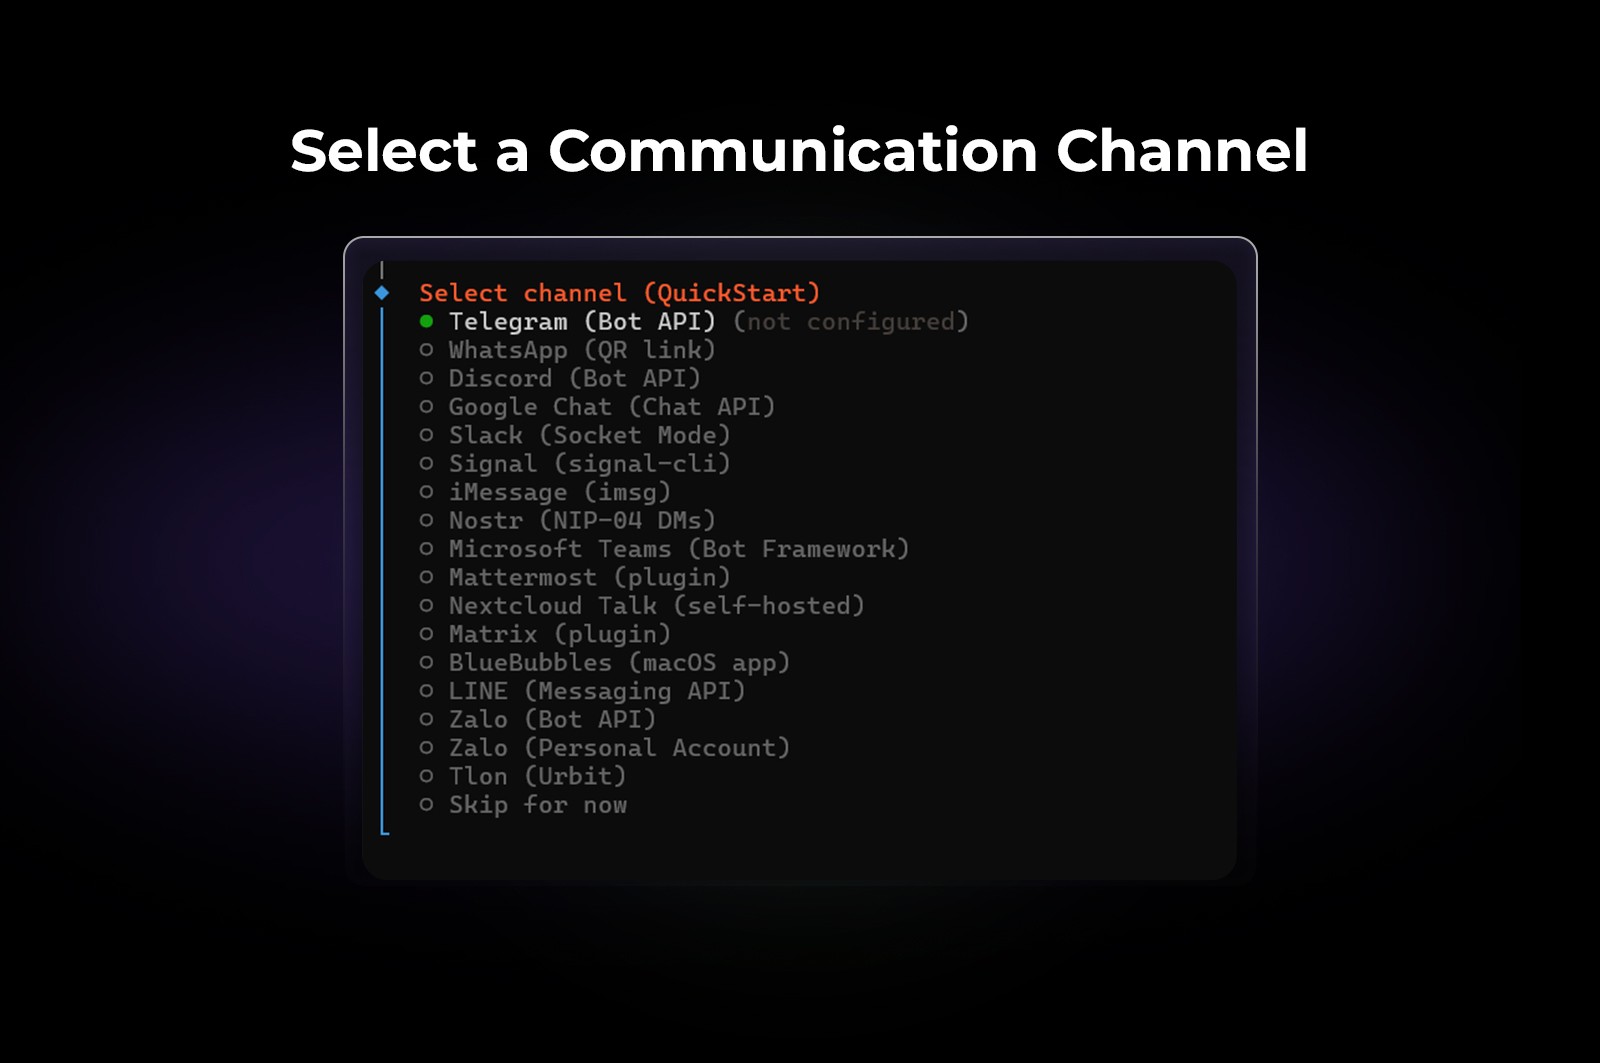
This could be Slack, Discord, or another supported channel depending on your configuration.
Step 11: Configure Skills Installation
You’ll now configure skills, which extend what ClawdBot can do.
Select npm (Node Package Manager) as the skills installer
You’ll see a list of available skills
Choose the skills relevant to your workflows
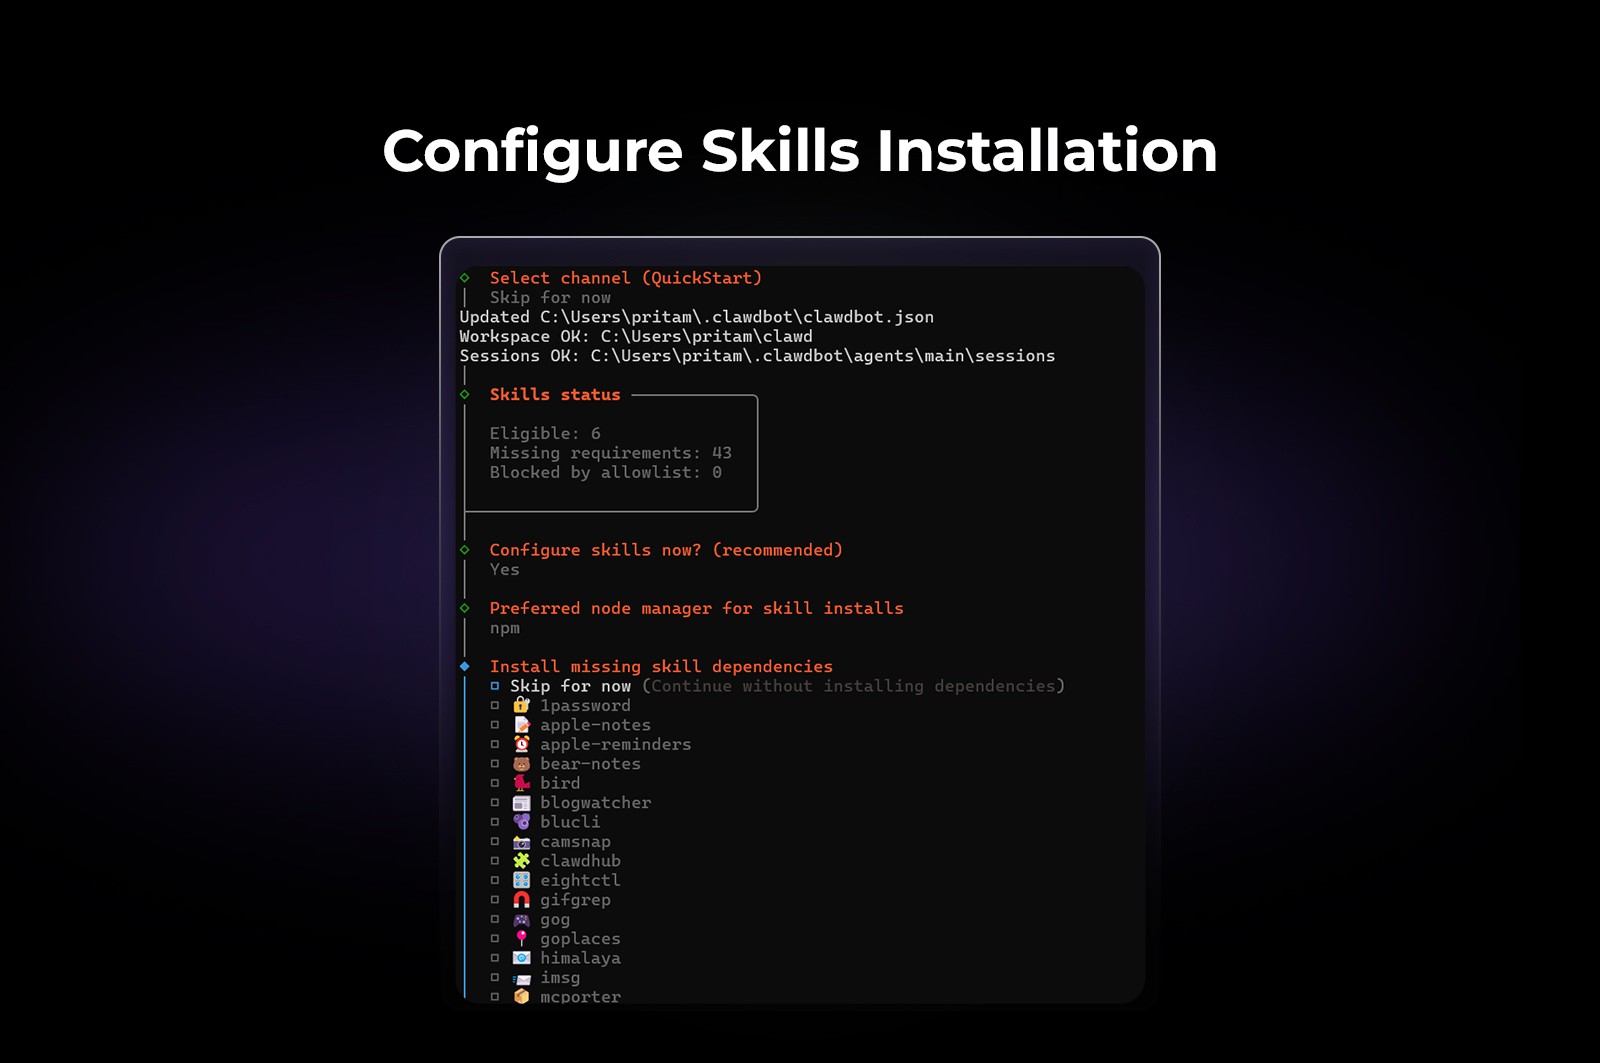
For performance marketers, this is where ClawdBot becomes more than a chatbot—it becomes an operator.
Step 12: Enable Hooks
ClawdBot will ask if you want to enable hooks.
Hooks allow ClawdBot to automate actions when specific agent commands are issued.
Example:
Saving session context to memory when you issue
/newTriggering actions after specific commands run
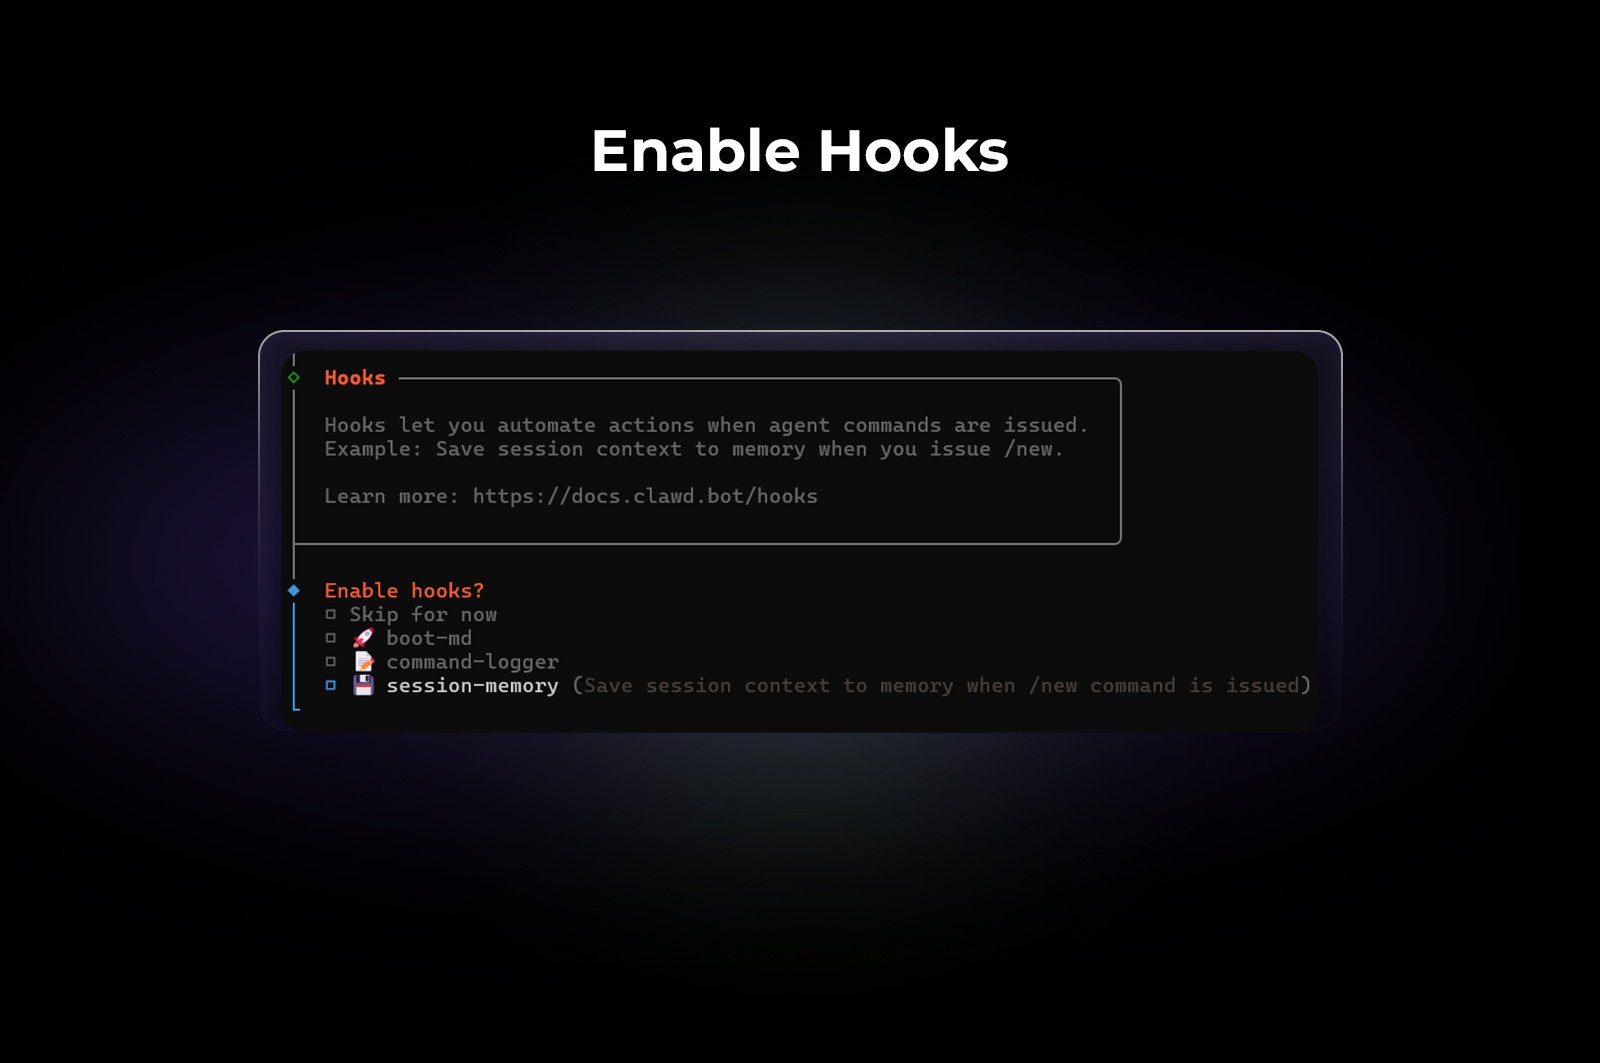
Hooks make ClawdBot more state-aware and automation-friendly.
Here, we’ve moved with enabling Hooks via session-memory
When prompted, select:
session-memory
This installs the default hooks configuration and completes the automation setup.
Step 13:
To open ClawdBot in a browser-based interface, select Web UI option:
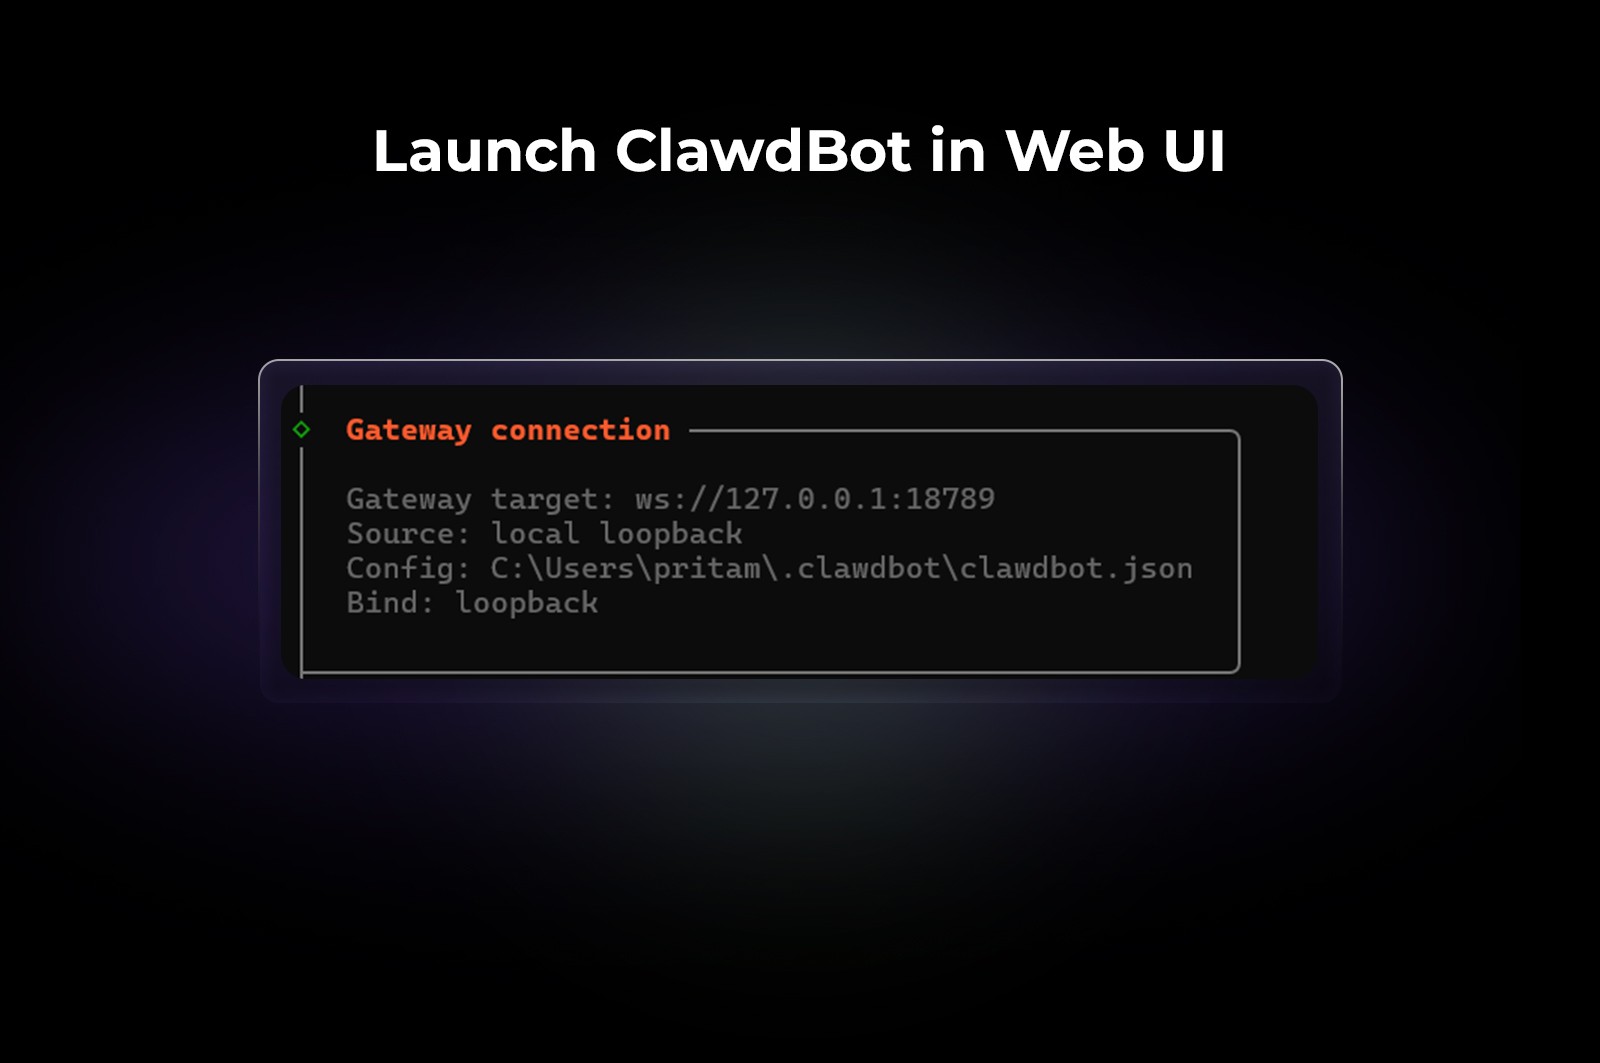
You’ll be redirected to a locally hosted IP address in your browser.
From here, you can:
Interact with ClawdBot visually
Run commands
Monitor sessions
Operate ClawdBot without staying inside the terminal
End Notes
ClawdBot is most powerful when treated as an operator, not a novelty.
Once installed, the real value comes from:
Pairing the right model with the right tasks
Installing skills that map to real workflows
Using hooks to reduce repetitive actions
Letting the agent handle structure, while you focus on judgment
If you’re a performance marketer experimenting with AI agents, ClawdBot offers a flexible, local-first way to test what automation actually belongs in your workflow—and what doesn’t.
Clarity comes from running systems, not just reading about them.
AI agents are quickly moving from experiments to daily operators. For performance marketers, that shift is especially important: less time configuring tools, more time interpreting outcomes and acting on them.
This guide walks through how to install and set up ClawdBot step by step, using the official one-liner installation. It’s written for operators who want ClawdBot running locally, connected to an AI model, and ready to send reports through a chosen channel—without guesswork.
What Is ClawdBot?
ClawdBot is a locally installed AI agent framework designed to run autonomous or semi-autonomous tasks directly from your machine.
Instead of working as a browser-only chatbot, ClawdBot operates as:
A terminal-based AI agent
With optional web UI
Capable of executing commands, installing skills, running workflows, and sending outputs to external channels
Because it runs locally, ClawdBot gives operators more control over:
Model selection (OpenAI, Google, Anthropic, OpenRouter, etc.)
Skills and hooks
Data flow and automation logic
This makes it particularly useful for performance marketers who want AI agents that can assist with research, reporting, automation, and repeatable operational tasks—without being locked into a single SaaS interface.
How Performance Marketers Can Use ClawdBot
For performance and growth teams, ClawdBot fits into workflows where repeatability and automation matter more than UI polish.
Common use cases include:
Generating and summarizing campaign performance reports
Automating research tasks across platforms
Running structured prompts repeatedly with different inputs
Sending insights or alerts to Slack, Discord, or other channels
Acting as a lightweight “AI operator” alongside Ads Manager, analytics tools, or internal scripts
The key advantage is flexibility: ClawdBot adapts to how you already work, instead of forcing a new dashboard-first workflow.
How to Install ClawdBot
Below is the official quick-start installation flow, broken down clearly so you can follow it without friction.
Pre-requisites
Before installing ClawdBot, make sure you have:
A Mac or Windows machine
Access to your system terminal / command prompt
Admin privileges (you’ll need your device password)
An API key for at least one AI provider (e.g. OpenAI, Google, Anthropic)
A basic familiarity with command-line prompts (no advanced knowledge required)
Step-by-Step ClawdBot Installation Guide
Step 1: Visit the Official ClawdBot Website
Go to: https://clawd.bot/
This is the official source for installation instructions and updates.
Step 2: Open the Quick Start Section
On the homepage, navigate to the Quick Start section.
Here, you’ll find multiple installation options.
Select the one-liner installation method.
This is the fastest and most reliable way to get started.
Step 3: Select Your Operating System
Choose your operating system:
macOS
Windows
Linux (if applicable)
ClawdBot will automatically display the correct one-liner command for your system.
Step 4: Copy the One-Liner Installation Command
Copy the generated command exactly as shown.
Open your terminal (Mac/Linux) or Command Prompt / PowerShell (Windows) and paste the above command.
Press Enter to begin installation.
Step 5: Confirm Installation
When prompted, confirm that you want to continue with the installation.
ClawdBot will now:
Download required files
Set up the local environment
Prepare onboarding steps
Step 6: Choose the Onboarding Method
You’ll be asked to select an onboarding method.
Choose: Quickstart
This option skips advanced customization and gets ClawdBot operational as quickly as possible.
Step 7: Select an AI Model Provider
ClawdBot will prompt you to choose an AI provider. Available options typically include:
At this stage, you’re only selecting the provider—not the specific model yet.
Step 8: Filter Models by Provider
When prompted to filter models by provider, select:
This ensures you can view the full list of available models before choosing a default.
Step 9: Choose a Default Model
Next, ClawdBot will ask you to select a default model.
For this setup, we’ve proceeded with:
You can always change the default model later as your workflows evolve.
Step 10: Select a Communication Channel
ClawdBot can send outputs—such as reports, logs, or updates—to a connected channel.
Choose the channel where you want ClawdBot to:
Send reports
Share updates
Surface automated outputs
This could be Slack, Discord, or another supported channel depending on your configuration.
Step 11: Configure Skills Installation
You’ll now configure skills, which extend what ClawdBot can do.
Select npm (Node Package Manager) as the skills installer
You’ll see a list of available skills
Choose the skills relevant to your workflows
For performance marketers, this is where ClawdBot becomes more than a chatbot—it becomes an operator.
Step 12: Enable Hooks
ClawdBot will ask if you want to enable hooks.
Hooks allow ClawdBot to automate actions when specific agent commands are issued.
Example:
Saving session context to memory when you issue
/newTriggering actions after specific commands run
Hooks make ClawdBot more state-aware and automation-friendly.
Here, we’ve moved with enabling Hooks via session-memory
When prompted, select:
session-memory
This installs the default hooks configuration and completes the automation setup.
Step 13:
To open ClawdBot in a browser-based interface, select Web UI option:
You’ll be redirected to a locally hosted IP address in your browser.
From here, you can:
Interact with ClawdBot visually
Run commands
Monitor sessions
Operate ClawdBot without staying inside the terminal
End Notes
ClawdBot is most powerful when treated as an operator, not a novelty.
Once installed, the real value comes from:
Pairing the right model with the right tasks
Installing skills that map to real workflows
Using hooks to reduce repetitive actions
Letting the agent handle structure, while you focus on judgment
If you’re a performance marketer experimenting with AI agents, ClawdBot offers a flexible, local-first way to test what automation actually belongs in your workflow—and what doesn’t.
Clarity comes from running systems, not just reading about them.